Trace Linux Kernel With Bochs(2) Create the boot section of OS!
boot section是被BIOS加载至内存的第一段OS代码,它的寿命不长,却意义深远:初步归化内存,加载OS的剩余部分进入内存。
创世者的遗志
志继
从上一篇文章中,我们知道了BIOS通过INT 0x19将硬盘(软盘)的0号磁头(head),0号磁道(track),第一个扇区(sector)读入到0x07c00的内存位置上。这个扇区就称作boot section。BIOS跳转到这里开始执行,boot section的代码。
规划
boot section的代码 首先将自己从内存0x07c00复制到0x90000,然后将它后续的4个扇区(setup section)读入内存0x90200开始的位置。这个操作是通过INT 0x13完成的。同样的方式,也就可以把剩余的240个扇区读入到内存中0x10000的位置。
通常,一个扇区是512Bytes,512转换成16进制就是0x200,由此可见,boot section 后续的4个扇区被它放在了内存中与自己紧挨着的位置。
其它的一些工作就不过多叙述了,有兴趣的读者可以阅读一下bootsect.S源码。最后,boot section通过jmpi 0, 0x9020跳转到setup section的第一条指令处开始执行。
实模式下的cpu通过两个16Bits的寄存器: 段基址寄存器CS(Code Segment)和段偏移寄存器IP(Instruction Pointer),来指示执行指令的位置。

早期的8086 cpu字长是16位,地址总线宽度为20,因此其寻址方式采用CS:IP的方式。

这种形式构成的线性地址为(CS<<4) + IP。如CS=0x9020,IP=0x0时,形成的线性地址为0x9020<<4 + 0x0 = 0x90200。

jmpi 0, 0x9020通过将CS置成0x9020,将IP置成0,来执行CS:IP处的代码。
Hello OS World!
写源码
因为工具的原因,你可能需要了解GAS和NASM的区别
代码如下:
#Filename: boot.S

.code16 #use 16bit
.text   #code segment start

    movw    %cs, %ax    #cs:ip was initialized by BOIS instruction 'jmpi 0, 0x07c0'
    movw    %ax, %ds    #initialize ds, es and ss with cs
    movw    %ax, %es
    movw    %ax, %ss
    movw    $0x7c00, %sp    #allocate stack, get ready for call
    call disp_msg   #call the function of display message
inf:
    jmp inf #infinite loop to see the result

disp_msg:
    movw $msg, %ax  #initialize bp with the msg address
    movw %ax, %bp
    movw len, %cx   #prepare the arguments for int 0x10
    movw $0x1301, %ax
    movw $0x00c, %bx
    movb $0, %dl
    int $0x10
    ret

msg:
    .ascii "Hello, OS world!"
len:
    .int . - msg
    .org 510    #fill the blank
    .word 0xaa55    #maybe a magic number
注:通过INT 0x10将字符串输出的显示设备上。
编写Makefile
Makefile是linux下常用的组织工程和自动化编译的方式。
CC = gcc
LD = ld
LDFILE = ld_script.ld
OBJCOPY = objcopy

all: boot.img

boot.img: boot.bin
    @dd if=/dev/zero of=empty_floppy.img bs=512 count=2880
    @dd if=boot.bin of=boot.img bs=512 count=1
    @dd if=empty_floppy.img of=boot.img skip=1 seek=1 bs=512 count=2879

boot.bin: boot.elf
    @$(OBJCOPY) -R .pdr -R .comment -R .note -S -O binary boot.elf boot.bin

boot.elf: boot.o
    $(LD) boot.o -o boot.elf -e c -T$(LDFILE)

boot.o: boot.S
    $(CC) -c boot.S

clean:
    @rm -rf boot.o boot.elf boot.bin boot.img
首先通过gcc(实际上是gcc调用了汇编器as) 将boot.S汇编成boot.o,ELF格式的可重定位文件(ELF Relocatable File)。可重定位文件给了我们足够的自由,毕竟BIOS只会简单的跳转到0x07c00的位置上执行。
利用ld命令可以方便地将boot.o进行链接(重定位),进而得到boot.elf,ELF格式的可执行文件(ELF Executable File)。
但是这里所谓的可执行文件,却无法在没有操作系统的情况下执行,boot.elf的执行需要操作系统提供的ELF Loader才能正常执行。
因此还需要关键的一步,利用objcopy去掉ELF中多余的东西(如comment 段,note 段,符号表),进而生成boot.bin,Raw Binary文件。
最后,利用dd命令生成软盘镜像(实际就是个块文件?)
链接脚本
SECTIONS
{
    . = 0x0;
    .text :
    {
        _ftext = .;
    } = 0
}
所有的东西都准备好之后,轻轻敲下make,得到下面的结果:

编写bochs配置文件
megs: 32
mouse: enabled=0

floppya: 1_44=./boot.img, status=inserted
# ata0-master: type=disk, path="./c.img", mode=flat, cylinders=20, heads=16, spt=63

log: bochsout.log

boot:floppy

#display_library: sdl
运行命令bochs -f bochsrc
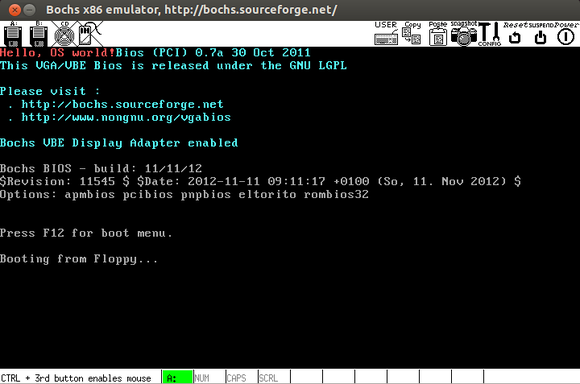
blog comments powered by Disqus